When we put QuickTime Player at the top of our list of the Best Free Audio Recording Software for Mac, we also promised a full tutorial to follow up that praise. Sure, QuickTime Player for Mac isn’t a full-fledged digital audio workstation (DAW), but when you need to a quick (no pun intended) recording, this built-in tool should be your favorite stand-by.
QuickTime Player for Mac: More than a Player
As we’ve ranted before, QuickTime Player is easily the most poorly named Apple product out there. By tacking the word ‘player’ to the name, Apple practically begs users to dismiss what this application is capable of. Sure, it will play your audio and video files, but that’s just the tip of the iceberg.
QuickTime Player comes default as part of the Mac operating system. We’re using Mac OS X 10.10.5 for this example (Player version 10.4 (833.7)). When you first open the application, it does its best to stay true to its name by asking for a file to open. We’re just going to ignore this (though, if you want to actually open a file, don’t let us stop you).
A couple of things you should note at this point:
- Unlike every other application we can think of, the open dialogue box doesn’t prevent you from doing other tasks in the menu bar. (Weird, right?)
- QuickTime Player has no global preferences. (You can look for them if you want. They’re not there.)
The menus within QuickTime Player are pretty sparse, too. In fact, we’ll be doing most of our work for this tutorial straight from the File menu.
Let’s get started!
Create an Audio Recording
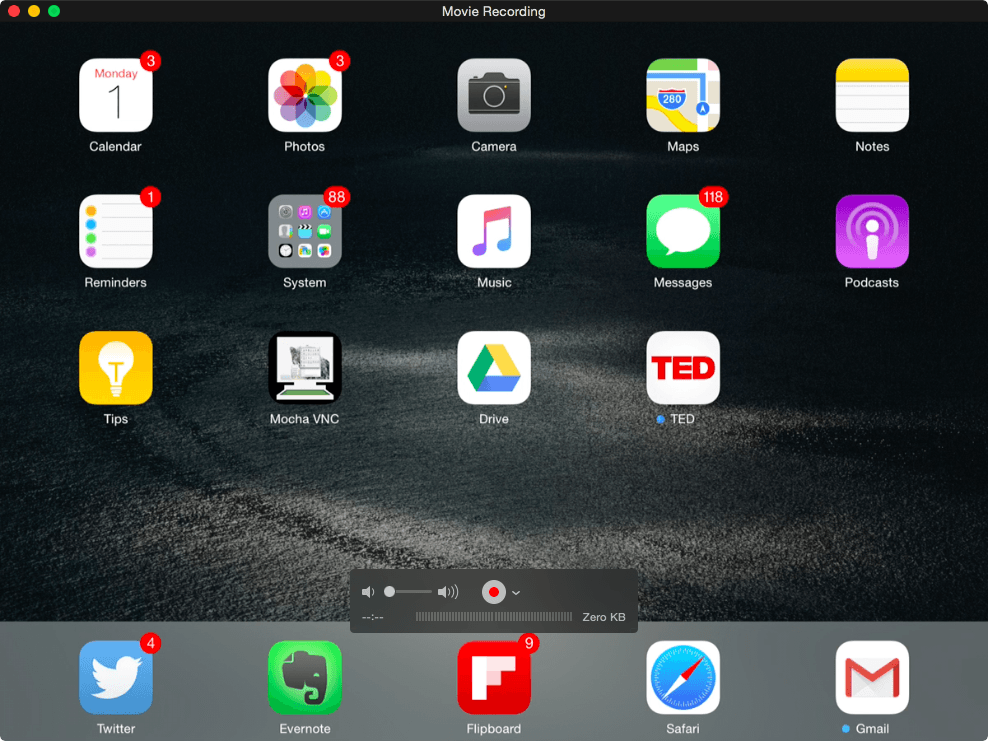
From the File menu, select New Audio Recording. The Audio Recording window appears.
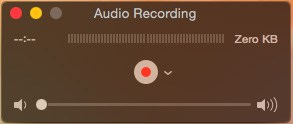
The Audio Recording window consists of the following elements:
- Total recording time
- Volume input meter
- Total file size
- Record button
- Microphone and Quality selection menu
- Volume slider
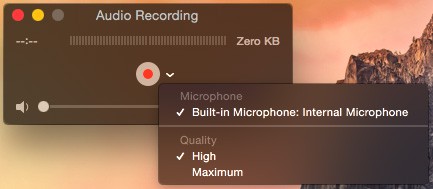 Let’s start with the Microphone and Quality selection menu, as this will set the basic parameters of your audio file. The menu is opened by selecting the inverted caret next to the record button. The computer’s available microphones (audio inputs) are displayed, as well as the option to select either High or Maximum quality.
Unless you have an external microphone or audio interface connected, you’re likely to only see ‘Built-In Microphone: Internal Microphone‘ listed for your Mac’s audio input options. If you have another option available and wish to use it, simply select it from the list.
Your Quality selection will affect the size of your final file (higher quality = bigger file). Your selection really only depends on the needs of your end product. If you’re passing along your file for use in a commercial project, for example, you’ll probably want to go with Maximum quality to ensure the highest fidelity available.
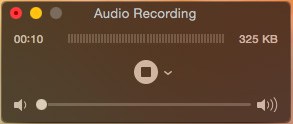 Now it’s time to record. Simply select the Record button to start. The Record button changes to a Stop button and the total running time and file size both begin to tick upwards as the audio file is being created. (Oh, and don’t forget to say something. After all, you just started recording!)
Keep in mind that there is no pausing. Once you start, you’re going until you stop. When you’re done with your recording, simply select the Stop button.
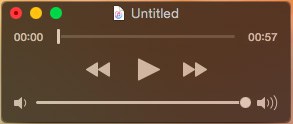 Once you’ve stopped your recording, the window’s ‘Audio Recording’ title changes to ‘Untitled‘, the volume input meter is replaced by a time slider, and the Record button and Microphone and Quality selection menu are replaced by a trio of buttons: Rewind, Play and Fast Forward. Let’s take a look at what each of these new features offer us.
‘Untitled’ is now the name of your new audio file. (If you were to create a new audio file at this point, it would become ‘Untitled 2’, and so on.) Since this default naming scheme isn’t very descriptive (or helpful), we’ll want to rename the file. Lucky for you, this is quick and easy to do.
From the File menu, select Save. The save options window appears. Input a new name for your audio file in the Export As field. If you want to add a tag (or tags) to your file, select it from the Tags field drop-down. Finally, select a location in which to save your file from the Where drop-down menu. Once you’ve set your options, select the Save button. Notice that ‘Untitled’ has now been replaced by the new name you entered.
If you want to double-check these new settings, simply hover over the file name and a new menu selector appears to the right of the name (the inverted caret, again). Click on this selector and a pop-up menu appears, which is very similar to the Save dialog window we just covered. In fact, you can change the name, add or remove tags, and change the file location from this pop-up. Accessing this menu prior to using the standard Save option would only allow you to set the tags, so remember to always save first.
The Control Buttons
The new control buttons that replaced the record button in the center of the pane are your standard Rewind, Play and Fast Forward buttons. Selecting the Play button in the center will start playback of your audio file. Once selected, the Play button changes to a Pause button. Selecting the Pause button will stop the recording at its current location.
The Rewind and Fast Forward buttons actually do a bit more than simply move you back and forth within the audio file. Select either the Rewind or Fast Forward button once. The playhead begins moving at twice the normal rate, and a ‘2x’ appears next to the button indicating the speed. Select the button again, and the rate increases to five times the normal playback speed. You can continue increasing the directional rate up to sixty times the normal speed.
Of course, sometimes you simply want to quickly move to and stop at a point in the audio file. In this case, hold down the Rewind or Fast Forward button when you select it. When you’re ready to stop the playback, simply release the button. (Due to holding the initial click, this technique will only move at twice the normal playback speed.)
The Time Slider
If you already have a pretty good idea of where you want to start playback of your audio file, you also have a quick time slider at your disposal. Just click and hold the vertical bar on the slider (which indicates your current location in the file) and drag it to the new time location. Note that the time indicator on the left changes as you move the slider bar.
Editing Your Audio File
So, now you know how to play back and move around within your audio file. But what if you want to edit it? Well, if you’re looking to do any heavy editing, such as splicing out sections or adjusting volume in select regions, you’ll need to import your saved audio file into a DAW or other full-featured audio editor. However, QuickTime Player does offer one very useful editing function: trimming. The Trim tool is used to remove unwanted portions from the beginning and/or end of your audio file, such as silence or audible countdowns and other noise.
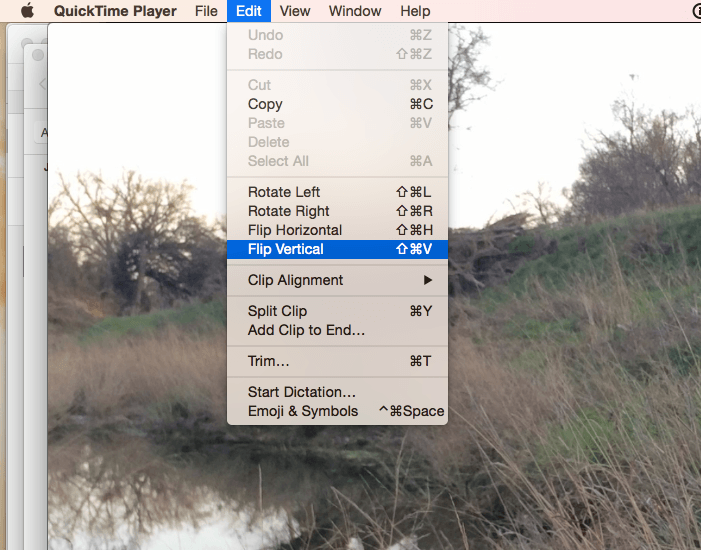
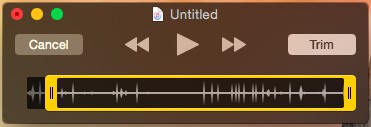 The trimming controls will look familiar to anyone with an iPhone, as they are very similar to trimming a video in the Photos app. From the Edit menu, select Trim. The volume slider is replaced by a waveform representation of the audio file with a yellow outline and trim handles on each end of the waveform.
To trim the audio file, select and hold a trim handle from the beginning or end of the audio file’s waveform. Drag the trim handle to the desired position on the timeline and release. Once you’re done trimming your file, select the Trim button to finalize the changes.
Save and Save Often
When you’re finished, be sure to save your file again to make your adjustments permanent. Select Save from the File menu, or use the Command+S keyboard shortcut. In fact, you should make it a habit to save your file any time you make a change to ensure you don’t lose any revisions. As my teacher always reminded us in college, “Save and save often.” It’s a pretty good mantra, actually.
But wait…there’s more!
Hopefully we’ve already shown you a few bits you didn’t know QuickTime Player for Mac could do, but we’re just getting started. In the second part of our tutorial, we show you how to create video files with QuickTime Player.
Let us know what you think of this tutorial by leaving your comments below. Thanks!


